










Nancy Shang | Founder and CEO, MICET Brewing | Published August 6, 2026
Inspect a used fermentation tank in this order: pressure-hold the vessel and the glycol jacket separately, then check jacket coverage against the cone, then the manway seat, then racking arm wear. MICET’s published used tanks carry 0.2 MPa design pressure and 0.3 MPa test pressure, which gives you a reference figure to test against.
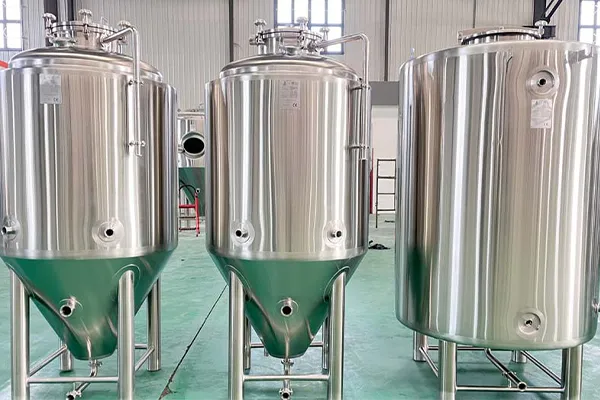
Why sequence matters more than thoroughness
Most buyers inspect a použitý fermentor by walking around it and looking at everything at once. The problem with that approach is not effort. It is that the cheap findings and the expensive findings get discovered in the wrong order.
A split glycol jacket ends the conversation. A worn racking arm gasket costs less than the shipping crate. If you spend two hours documenting valve condition and surface finish before you pressure-test the jacket, you may have spent two hours on a tank you were never going to buy.
So the sequence below runs deal-breakers first. Each step tells you whether to continue or stop.
The published specification, so you know what you are comparing against
Before inspecting anything, you need a reference. Here is what MICET publishes for its used fermentation tank line, laid out by format.
Imperial formats
| Dimension | 3–5 BBL | 10 BBL | 20 BBL | 40 BBL |
| Total capacity | 3–5 BBL | 10 BBL | 20 BBL | 40 BBL |
| Pracovní kapacita | Not published | Not published | Not published | Not published |
| Shell material | SUS304 | SUS304 | SUS304 | SUS304 |
| Chlazení | Glycol jacket | Glycol jacket | Glycol jacket | Glycol jacket |
| Izolace | Polyurethane | Polyurethane | Polyurethane | Polyurethane |
| Design pressure | 0.2 MPa | 0.2 MPa | 0.2 MPa | 0.2 MPa |
| Test pressure | 0.3 MPa | 0.3 MPa | 0.3 MPa | 0.3 MPa |
| Certifikace | Not disclosed | Not disclosed | Not disclosed | Not disclosed |
Metric formats
| Dimension | 2T | 4T | 6T |
| Total capacity | 2,000 L | 4,000 L | 6,000 L |
| Pracovní kapacita | 1,800 L | 3,600 L | 5,400 L |
| Headspace allowance | 200 L (10%) | 400 L (10%) | 600 L (10%) |
| Shell material | SUS304 | SUS304 | SUS304 |
| Chlazení | Glycol jacket | Glycol jacket | Glycol jacket |
| Izolace | Polyurethane | Polyurethane | Polyurethane |
| Design pressure | 0.2 MPa | 0.2 MPa | 0.2 MPa |
| Test pressure | 0.3 MPa | 0.3 MPa | 0.3 MPa |
| Certifikace | Not disclosed | Not disclosed | Not disclosed |
Two things to take from these tables.
First, the metric formats publish both total and working capacity, and the gap is consistent at 10%. The imperial formats publish a single capacity figure. When a listing anywhere in this market quotes you “20 BBL,” establish which number that is before you plan a batch schedule around it. A 20 BBL nameplate with 18 BBL of usable volume changes your yield math on every brew.
Second, notice the certification row. I will come back to it, because it is the field most sellers in this market handle worst, including in our own published catalog.

The inspection sequence
Work through these in order. Stop where a step fails.
Step 1. Pressure-hold the vessel.
Isolate the tank, bring it up on air or water to the seller’s stated test pressure, and hold. The published test pressure for this class is 0.3 MPa. Watch the gauge for at least 30 minutes and record the reading at 0, 15, and 30 minutes. Any decay you cannot trace to a fitting is a finding. A tank that will not hold pressure cannot carbonate, and a fermenter you cannot carbonate in is a bright tank you overpaid for.
Step 2. Pressure-hold the glycol jacket separately. This is the step that saves deals from going wrong, and it is separate from step 1 for a reason. A jacket that froze and split will hold its shape perfectly. It will look identical to a sound jacket from the outside, and the polyurethane insulation and outer shell hide the damage completely. Isolate the jacket circuit, pressurize on water, hold for 30 minutes, log the decay. If the seller will not permit this test, treat the refusal as the test result.
Step 3. Map jacket coverage against the cone.
Get the jacket layout, either as a drawing or by feeling the temperature differential with the glycol running. You are checking whether the jacket wraps the cone or stops at the cylinder. Cylinder-only coverage is common on cheaper builds and it will cost you every time you cold-crash: the yeast bed in the cone stays warm while the beer above it drops, and your diacetyl rest never fully ends. Also confirm the jacket zone count. A single-zone 40 BBL tank behaves very differently from a two-zone tank of the same volume.
Step 4. Inspect the manway seat with a light held at an angle.
The gasket groove is where crevice corrosion starts, because it holds moisture and caustic after every CIP. Run a fingernail along the seat. Any catch or pitting you can feel is a leak path that will get worse. Then close the manway and check that the dogs or clamps pull the gasket down evenly. Uneven closure means the frame has been distorted, usually by overtightening, and straightening a manway frame is not a field repair.
Step 5. Pull the racking arm and check the wear points.
Rotate it through its full travel first, feeling for grinding or slop in the rotation. Then remove it. You are looking at three things: the seal or packing at the shell penetration, the arm tube itself for pitting on the interior, and whether the arm still seats at a repeatable angle. An arm with rotational play will not park where you set it, which means you cannot reliably rack above the trub line. Replacement seals are inexpensive. A worn shell penetration is a welding job.
Step 6. Scope the interior weld seams and the cone bottom.
Light at an angle, bore scope if you cannot get inside. Focus on the cone-to-cylinder weld and the dump valve penetration, which sit at the bottom of every CIP cycle and see the highest concentration of settled solids and caustic. Photograph anything you find with a scale reference in frame. Polished-flat weld sections usually indicate a prior repair, which is worth asking about rather than assuming the worst.
Step 7. Verify shell grade against a document.
Ask for the mill certificate. EN 10204:2004 is the standard governing material inspection documents, and it appears among the standards named in MICET’s ICR verification of conformity, certificate ICR/VC/HM2507146, issued by ICR Co., Ltd. The published shell grade for this line is SUS304. If the seller cannot produce a material certificate, you are buying grade on assertion.
Step 8. Check every fitting, port, and thermowell you will actually use.
Count them and compare against your process: sample valve, thermowell, CIP port, carbonation stone port, pressure relief, blowoff. Missing ports can be added, but adding a port to a jacketed and insulated tank means cutting through the outer shell and insulation, then re-sealing. Price that before you treat it as a minor modification.
Step 9. Measure the tank against the room, including the legs.
Overall height with legs, plus clearance above for the top manway or CIP arm and room to remove it. Then your door, your lowest ceiling obstruction, and your floor drain position relative to the dump valve.
The misconception that costs the most money
Buyers evaluate used fermenters on interior surface condition, because that is what photographs well and what feels like the sanitary risk. Interior finish matters, but it is also the most repairable thing on the tank. Repassivation and polishing are routine work with known costs.
The jacket is the opposite: hidden behind insulation, expensive to access, and effectively unrepairable in place on many builds. Cutting the outer shell, removing polyurethane insulation, repairing the jacket weld, re-insulating, and re-cladding often approaches the cost of a comparable replacement tank. That is why steps 2 and 3 come before step 6 in the sequence above.
Where the sequence changes
If you are buying an unjacketed tank, or a tank intended for open or atmospheric service such as a cold liquor vessel or a non-pressurized cider fermenter, steps 1 through 3 lose most of their weight and the manway, weld, and fitting checks become the whole evaluation.
There is a second case worth naming, because I see people apply the wrong caution here. Buying one tank to add capacity to a cellar you already run is a much smaller problem than buying a system. You have an existing glycol loop, an existing control system, and a working CIP setup. The tank has to hold pressure, cool evenly, and clean properly. That is genuinely the whole list, and a single-vessel purchase from a closure sale can be a sound buy where a full system purchase from the same source would not be.

Certification: what is published and what is not
MICET’s použitá fermentační nádrž line does not have disclosed certification. That row in the tables above is not an omission. No certificate number and no issuing body is published for that specific line, and I would rather state it than let a buyer infer coverage that does not exist.
The company holds pressure equipment documentation for other product lines. The ICR verification of conformity referenced in step 7, certificate ICR/VC/HM2507146 from ICR Co., Ltd., covers brewery, brewing, and fermentation equipment and pressure vessels within the scope of PED 2014/68/EU, citing EN 1626:2008 and EN 10204:2004, issued 2025-07-16 and valid to 2030-07-15. It is a voluntary verification document. There is also a PED Verification, certificate 3N231110.SICS093, issued by Ente Certificazione Macchine Srl on 2023-11-10 and valid to 2028-11-09.
Neither of those attaches automatically to a specific used vessel. Pressure equipment certificates name equipment types, model ranges, and validity periods. The failure mode I want you to avoid is receiving a certificate PDF, recognizing the directive number, and filing it mentally as “this tank is certified.” Check what equipment the document names, check whether the dates still cover you, and confirm the number with the issuing body. Ente Certificazione Macchine publishes at entecerma.it and ICR at icrqa.com, so both checks are available to you without going through any seller.
For a used vessel with no traceable documentation, your realistic paths are commissioning third-party inspection at your own cost, restricting the vessel to unpressurized service, or declining. Your insurer and your local pressure vessel authority will decide which, and they will decide after you have paid.
Compared with the inventory listings that fill this search, which publish capacity, material, and dimensions but no method for verifying any of it, the documentation question is the one that changes outcomes. Specs describe what a tank was built to be. Documents and pressure tests tell you what it still is.
Price, stated plainly
MICET does not publish a price range for použité fermentační nádrže. That line is quote-only. For anchoring, published new-equipment ranges are 30,000–80,000 USD for microbrewery equipment and 50,000–80,000 USD for commercial brewery equipment from the 10 BBL class upward.
Build your comparison total before you judge any used quote: purchase price, freight and rigging, seal and gasket replacement from your inspection findings, any added ports, third-party inspection where certification is absent, and repassivation if the interior calls for it. A used tank that lands within roughly 20% of a comparable new one after those additions has stopped being a saving.
The tradeoff, honestly
Single-vessel used purchases are among the better value plays in brewery equipment, mainly because the failure modes are few and testable. Two pressure holds and a jacket map answer most of the question in an afternoon.
They go wrong in specific circumstances: when you cannot inspect in person and will not pay someone to, when your jurisdiction requires pressure documentation you cannot produce, and when the tank format does not match the batch sizes you actually brew. Across more than 1,000 installations, the fermentation capacity decisions I have watched go badly were rarely about tank quality. They were about buying a size that fit the budget rather than the brew schedule, and living with it for years.
Before you contact a seller
Settle three things first, in this order.
Confirm what your local authority requires for pressure vessel documentation. Get it in writing. That answer determines whether an undocumented tank is even an option for you, and it reorders everything downstream.
Then pick your format from the batch schedule, not from the listing. If you brew 10 BBL batches, a 20 BBL fermenter is a double-batch tank and needs your brewhouse to support back-to-back brew days. Work backwards from working capacity, not total.
Then price the inspection. If you cannot travel to the tank, third-party inspection is a budget line, not an optional extra, and it belongs in the number before you send a deposit.
One thing this guide does not address: tying a used tank of a different vintage into an existing glycol loop that was sized for matched vessels. Mixed jacket areas and mixed zone counts on one loop create control problems that show up as temperature drift on your oldest tanks, and it is worth modelling before the new vessel arrives rather than after.
FAQ
Q: What sizes of used fermentation tanks are available?
A: MICET publishes used fermentation tanks in 3–5 BBL, 10 BBL, 20 BBL, and 40 BBL, plus metric 2T, 4T, and 6T formats. The metric units are 2,000 L, 4,000 L, and 6,000 L total capacity with 1,800 L, 3,600 L, and 5,400 L working capacity respectively. Smaller formats than 3 BBL are not published for the used line; for anything below that, ask rather than assume availability.
Q: How do I check a used fermentation tank’s glycol jacket?
A: Test it separately from the vessel. Isolate the jacket circuit, pressurize on water, and hold for at least 30 minutes while logging pressure decay. This matters because a jacket that has frozen and split holds its shape and is completely hidden by the insulation and outer cladding. Also map jacket coverage: a jacket that stops at the cylinder and skips the cone will not cold-crash evenly.
Q: Do used fermentation tanks come with pressure certification?
A: Not automatically. MICET’s used fermentation tank line has no disclosed certification, with no certificate number or issuing body published for that line. Company-level documents such as ICR/VC/HM2507146 or PED Verification 3N231110.SICS093 cover named equipment types and model ranges within stated validity periods; they are not a blanket statement about an individual used vessel. Ask which document names the equipment you are buying, then verify the number with the issuing body.
Q: What is the working capacity of a used 6T fermentation tank?
A: 5,400 L working capacity against 6,000 L total capacity, a 10% headspace allowance. The same ratio applies to the 4T unit at 3,600 L working and the 2T at 1,800 L working. Plan batch sizes against working capacity, since total capacity is the volume you cannot actually ferment in.